Step by Step Instructions
Crochet Stitches Standard: I am using the US/ International Standards
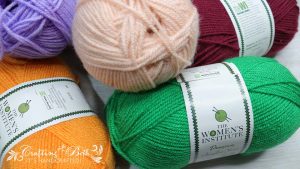
You will need the following:
- wool/ yarn suitable for 4mm hook
- 4mm crochet hook
- scissors
- darning needle (optional)
Let’s get started
Tension is very important, the yarn must be able to glide smoothly from your tension hand to the working hand, not too tight not too lose and follow the gauge of your hook.
Cluster Stitch:
- yarn over, insert hook into specified space and pull up a loop, yarn over, pull through 2 loops.
- yarn over twice, insert hook into the same specified space and pull up a loop, (yarn over, pull through 2 loops) twice.
- yarn over, insert hook into the same specified space and pull up a loop, yarn over, pull through 2 loops., yarn over and pull through all loops.
First, we start off with a slipknot
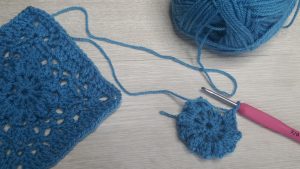
Foundation Ring:
For the foundation ring, I will count the slip knot as chain 1. This will avoid a bump around the ring.
Chain 5, this includes the slip knot. Slip stitch on the slip knot. You can also use the alternative open loop ring (also known as magic ring), this will work as well
Round 1: Wrong Side
- chain 1.
- ( single crochet. treble crochet ) into the ring 8 times.
- slip stitch into the first single crochet of this round.
Round Check: For this round, you should have 8 single crochets and 8 treble crochets, a total of 16 stitches.
I would say that this round would be the most tricky one as you really need to fit in those 16 stitches in a 5 chain ring. The positive side is that it pushes out the treble stitches which create that bumpy floral petals.
Round 2:
- chain 1. turn.
- single crochet on the same stitch
- chain 3.
- skip the next treble crochet, single crochet into the next single crochet.
- repeat the anchors 6 more times.
- chain 1. secure this round with a double crochet on the first single crochet of this round, this will serve as your last chain 3, as well as leaving you at the center of the last stitch space ready for the next round.
Round Check: For this round, 8 chain spaces (including the alternative double crochet)
Round 3:
- chain 2.
- work cluster stitch into the same space.
- chain 3.
- single crochet, chain 3, single crochet into the next chain space.
- chain 3.
- work cluster stitch into the next chain space. chain 3. work cluster stitch into the same chain space. chain 1. this serves as a square corner.
- Repeat the anchors and star items 2 more times.
- Repeat just the anchors 1 more time.
- work cluster stitch into the next space.
- chain 1. secure this round with a double crochet on the first single crochet.
Round Check: Each corner should have cluster stitch, chain 3, and another cluster stitch. There should be 3 (chain 3) spaces on each side.
Round 4:
- chain 1. single crochet into the same space.
- chain 3. single crochet into the next chain space.
- single crochet, chain 3, single crochet into the next chain space.
- single crochet into the next chain space. chain 3.
- (single crochet, chain 3, single crochet) into the next chain space. (this is a square corner).
- Repeat the anchors and star items 2 more times.
- Repeat just the anchors 1 more time.
- single crochet into the last corner space, chain 3, .and secure with a slip stitch into the first single crochet for this round.
Round Check: You should have 16 chain spaces for this round.
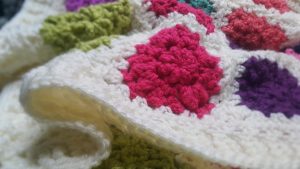
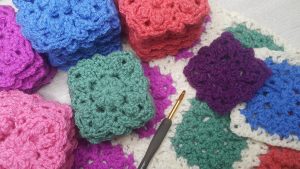
And there you have it, the Tinee Granny Square. Connect them together using whichever method you prefer