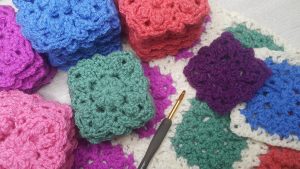
You will need the following:
- wool/ yarn suitable for 4mm hook
- 4mm crochet hook
- scissors
- darning needle (optional)
Step by Step Instructions
Crochet Stitches Standard: I am using the US/ International Standards
Let’s get started
Tension is very important, the yarn must be able to glide smoothly from your tension hand to the working hand, not too tight not too lose and follow the gauge of your hook.
First, we start off with a slipknot

Foundation Chains:
With the Elizabeth Stitch, you’ll need odd counts + 3 chains.
For this tutorial, I will be counting 17 chains for my main stitches and additional 3 chains as my turning chains, a total of 20 chains. This will create 9 Elizabeth stitches all through out your even pattern. You will always need 3 chains each turning chains. You’ll see this as you are working along.

Row 1:
Insert your hook on the fourth chain from hook and pull through a loop as if you are making a single crochet, but you will need to stop from here.
Check: You have 2 loops on your hook.

Instead, you will need to yarn over, insert hook into the same chain and pull through a loop as if you are making a half-double crochet.
Check: There should be 4 loops on your hook.

Next, yarn over and pull through all 4 loops. This is the Elizabeth Stitch.
Check: There should only be 1 loop on your hook.

Secure your stitch with a chain 1.

To continue on your next stitch, skip the next chain, and we are going to do our next Elizabeth stitch on the next chain.
Insert your hook on that chain and pull a loop as if you making a single crochet.
Check: There should be 2 loops on your hook.

Yarn over, insert your hook into the same chain, and pull a loop as if you are making a half double crochet.
Check: There should be 4 loops on your hook this time.

Next, yarn over and pull through all for loops.
Check: There should be 1 loop on your hook.
Again, secure your second Elizabeth stitch with chain 1.

Continue on doing the same instruction all across your chain stitches.
Check: Your last chain (which is actually our beginning first chain) should have your last Elizabeth stitch for this row. Remember, always secure your Elizabeth stitch with a chain 1.
Well done, you have finished the end of row 1.

Row 2:
Now we can continue on our next row. From here, chain 2 and turn.
Check: You should have 3 chains as the first chain is the one we have used to secure the last Elizabeth stitch. As already mentioned from above, you will always have 3 turning chains each time you proceed to your next row.

From this row and on to the next row thereafter, we need to understand where we should be making our next Elizabeth stitch.
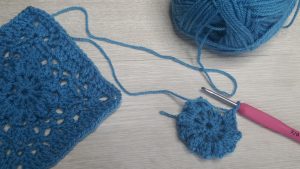
Check: Open up the spaces between 2 Elizabeth stitches. Notice that there are 2 spaces between them.
Remember when we made our first Elizabeth stitch on row 1, we insert the hook on the fourth chain from hook. As the picture shows below, we already have 3 chains from our hook, and therefore, we’ll insert our hook on the fourth chain space.

And so, let’s proceed inserting the hook into that first space between 2 Elizabeth stitches, and continue on making your stitch.
Check: Please refer to the figure below.

As you continue on this row, you will always make your Elizabeth stitch on that first space between 2 stitches.

Check: Remember at row 1, we skip the next chain, and proceed to the next chain to make our next stitch? That chain space I am pertaining to on this row is actually that.

Don’t forget to always make your last Elizabeth stitch on this row and thereafter on the turning chains.
Check: For this tutorial each row should have 9 Elizabeth stitches.

Continue on and you will end up this rather lovely stitches.

And there you have it. You should have your first Elizabeth Stitch project.