Tension is very important, the yarn must be able to glide smoothly from your left hand to the working project, not too tight not too lose.
In crochet, your hands are the working machine. It may take a little more practice to train your left hand with tensions, and of course your right hand is the one working with the hook and pattern.
You will need the following:
wool/ yarn suitable for 4mm hook
4mm crochet hook
scissors
darning needle
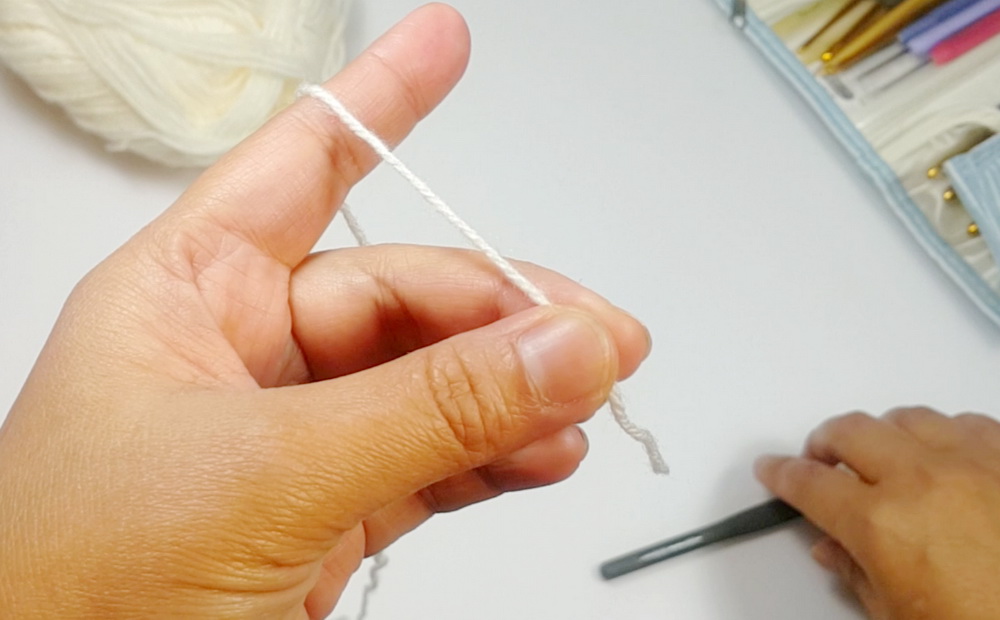
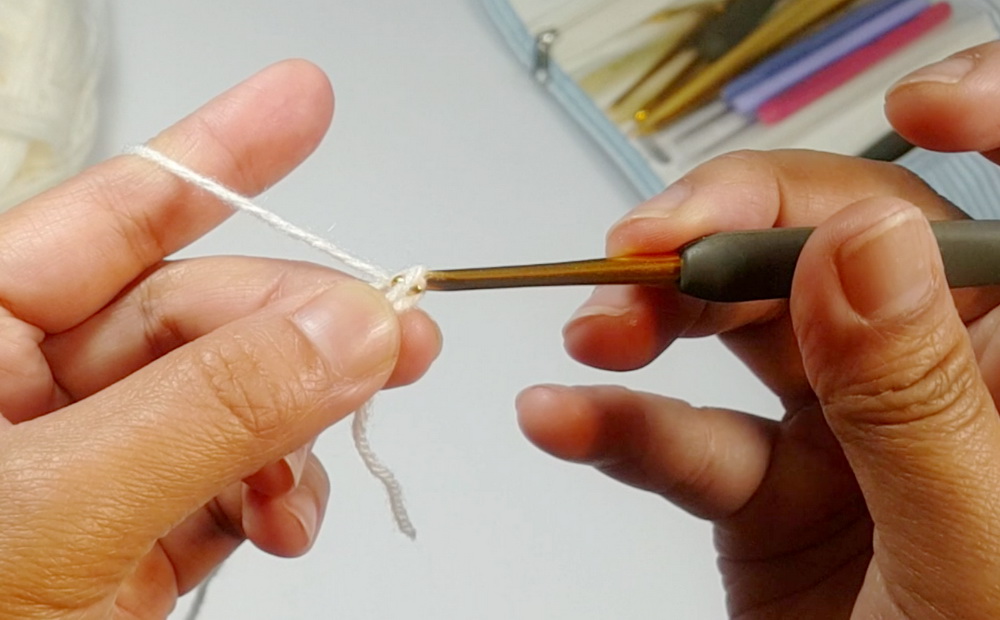
Start with your tension: As you see in the picture, the yarn is being held by your thumb and middle finger.
The pointy finger pointing up gives you the space for the working yarn. With your tensions ready, place your hook under the yarn between your thumb and pointy finger.
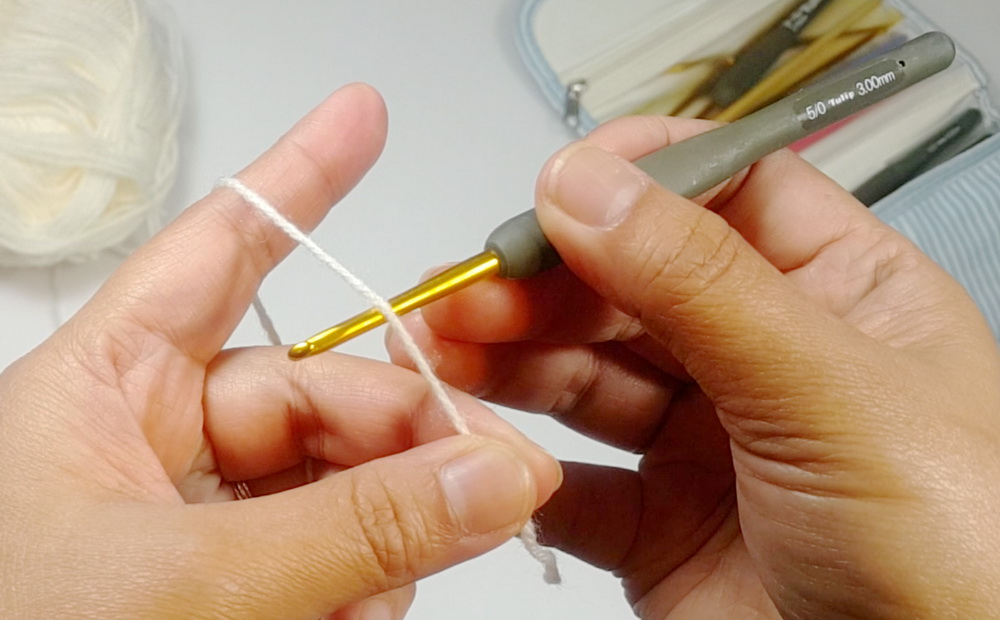
This will get you ready with the loop.
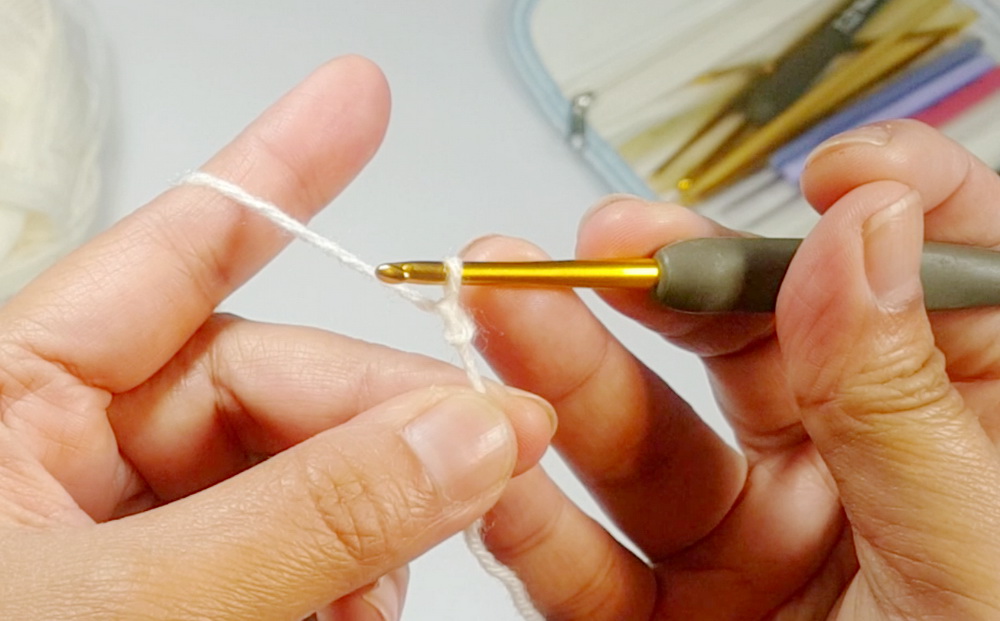
Make a loop by making a twist using the hook just like what you see in the picture.
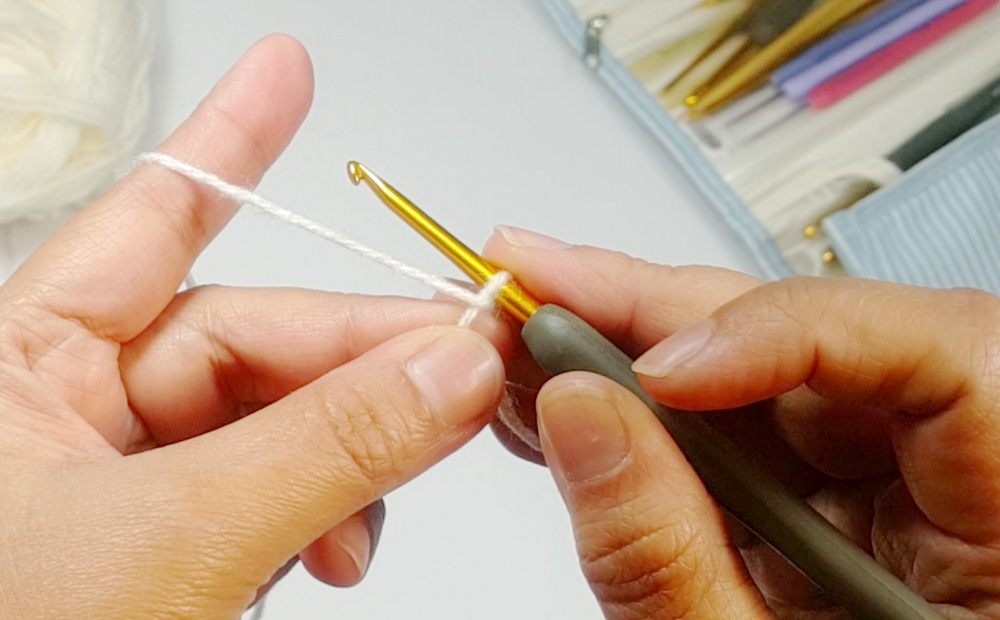
Now that you have the loop, it is best to protect its position by holding it with your thumb and middle finger. As you can see, the hook is merely above the working yarn area.
Make sure your tension is still in place This position will get you ready for the slip knot.
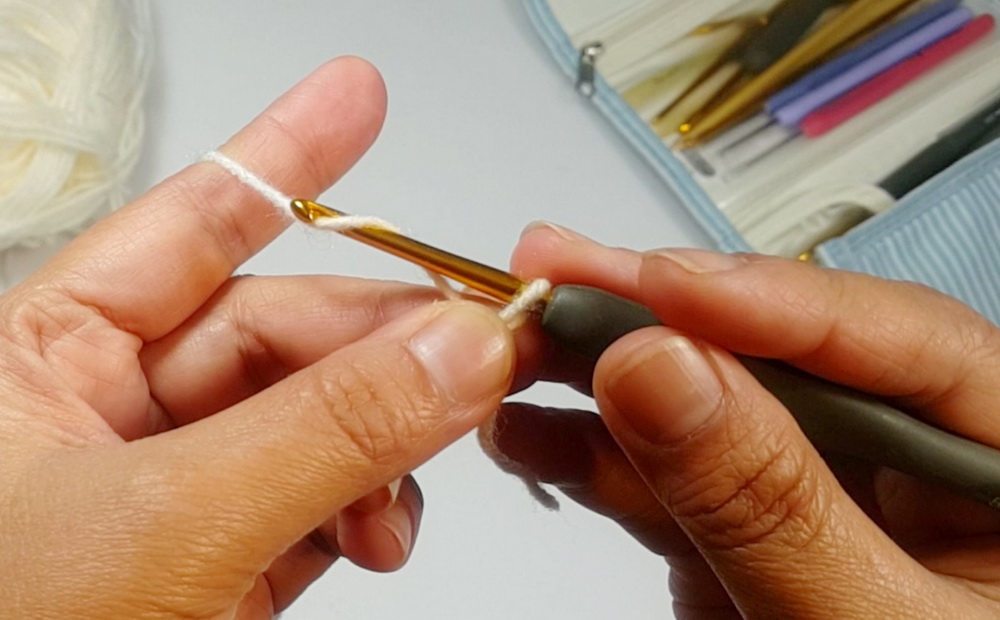
To make the yarn over, place your hook under the working yarn, to the back of the yarn, then over the yarn, with the hook locked it in place.
Here you will find the result as in the picture.
With your yarn over in position, pull the yarn with your hook into the loop that is protected by your thumb and middle finger.
Pull the yarn a little bit more to test your tension.
There you have it, the slip knot using your crochet hook is done.
The Finished Crochet Slip Knot
The slip knot should always be adjustable and be able to loosen up or tighten up.
See the video above to see how it is done interactively.
As always it’s Elizabeth, I hope you got something out of this tutorial and I hope this will be the beginning of your crochet journey.