Tension is very important, the yarn must be able to glide smoothly from your left hand to the working project, not too tight not too lose.
You will need the following:
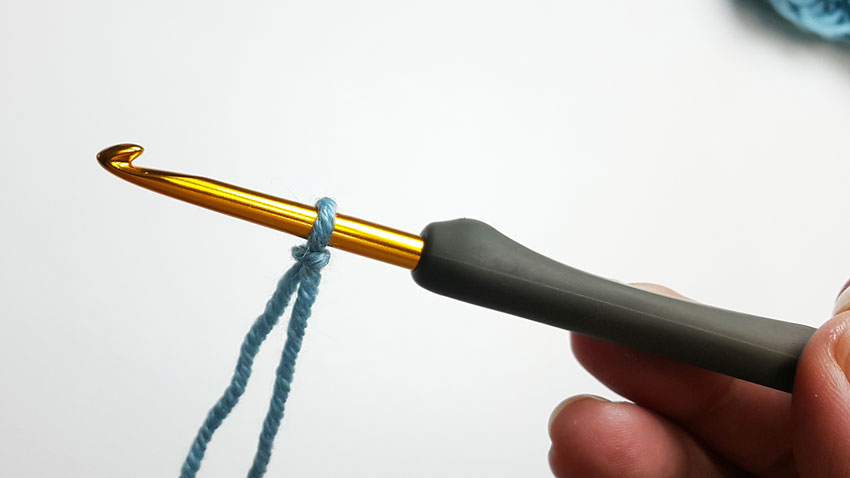
Step 1: Start off with a slipknot. Prepare your yarn tensions on your left hand (right either whichever is your orientation).
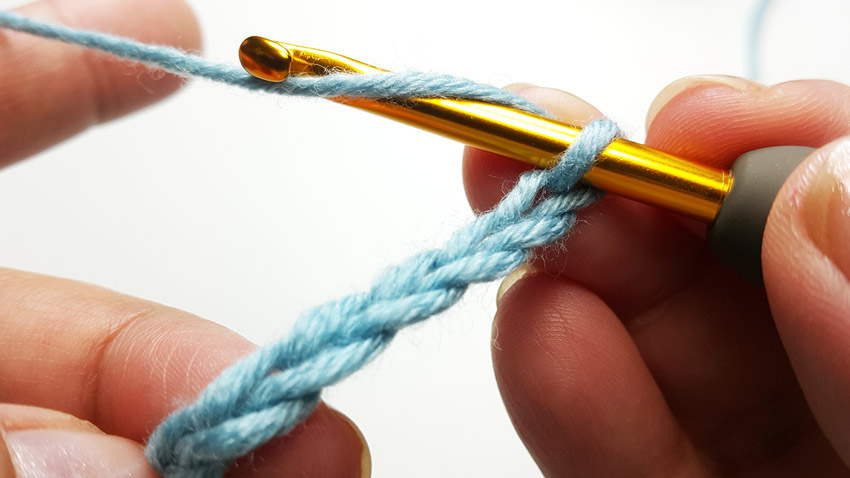
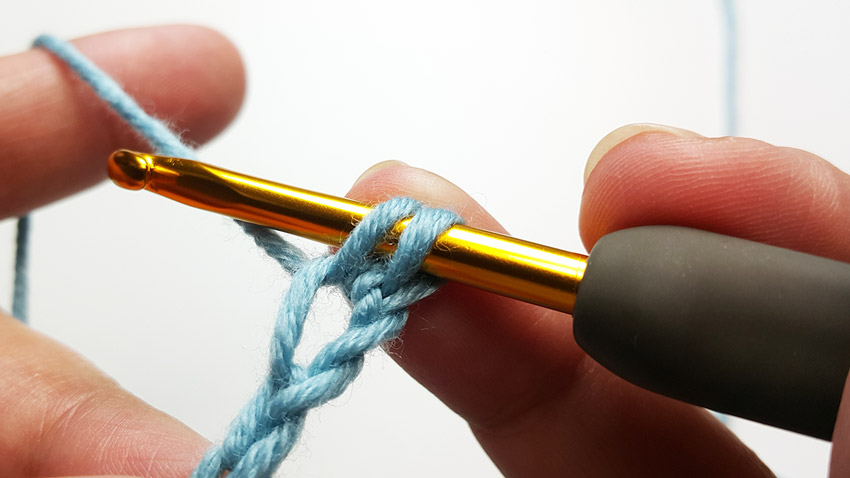
Step 2: Chain 10. Counting from the last loop on the hook (don’t count the loop on the hook).
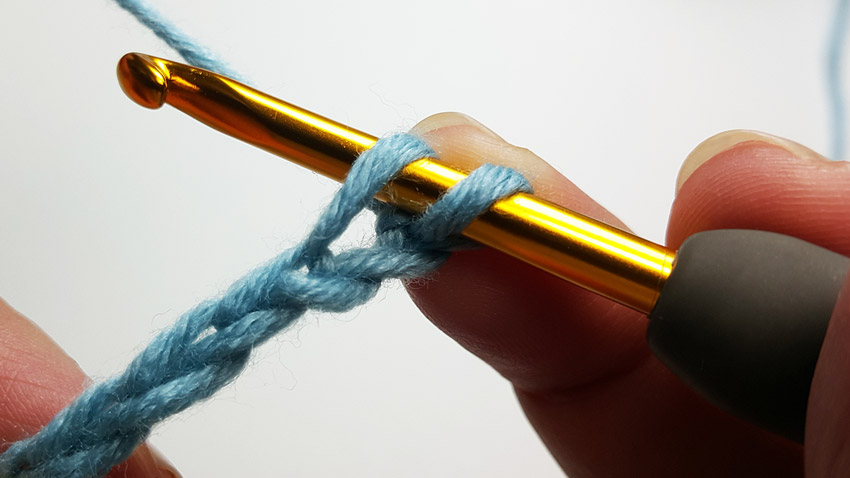
Step 3: Insert hook into the top loop of the second chain.
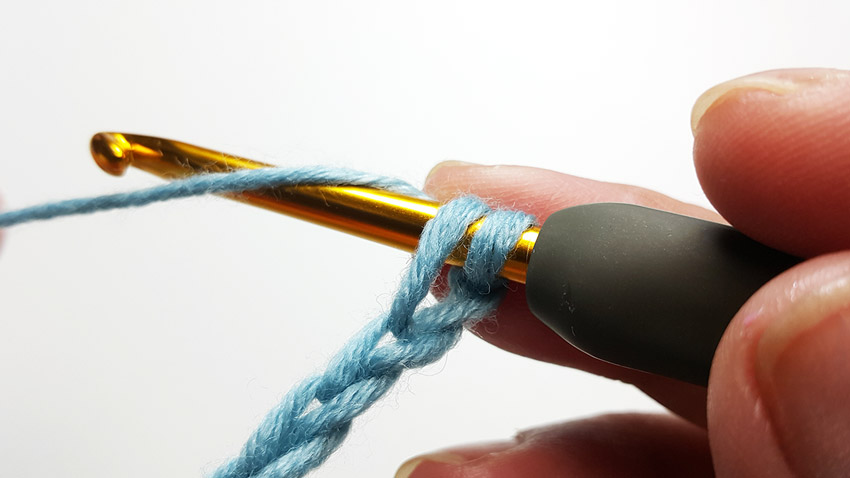
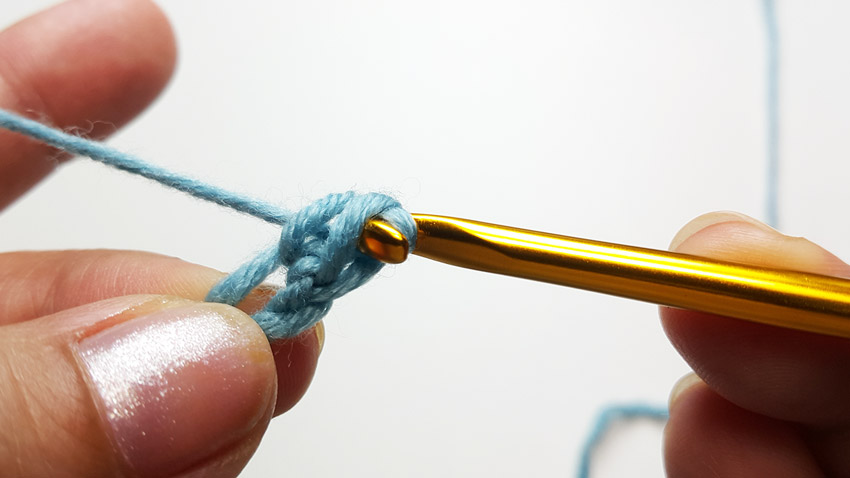
Step 4: Yarn over and pull up a loop.
Check: Now there are 2 loops on your hook.
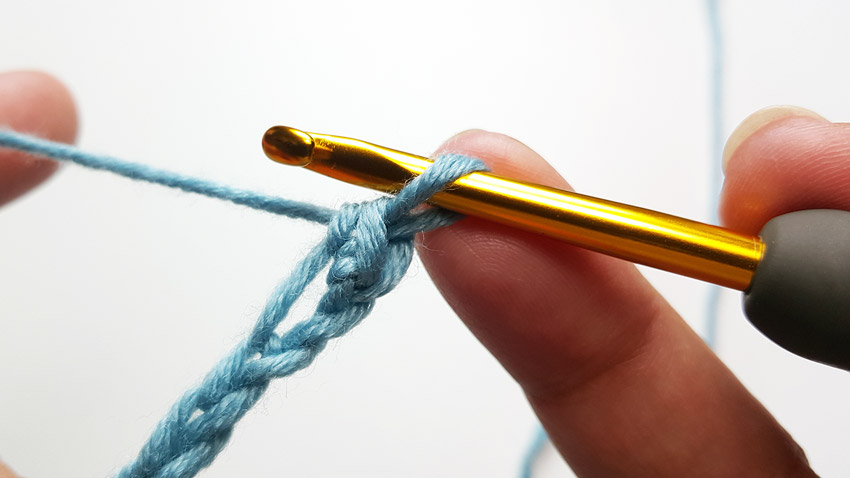
Step 5: Yarn over.
Step 6: Pull the yarn through two loops.
You have just made your first single crochet.
Step 7: Insert hook into the top loop of the next stitch just like Step 3.
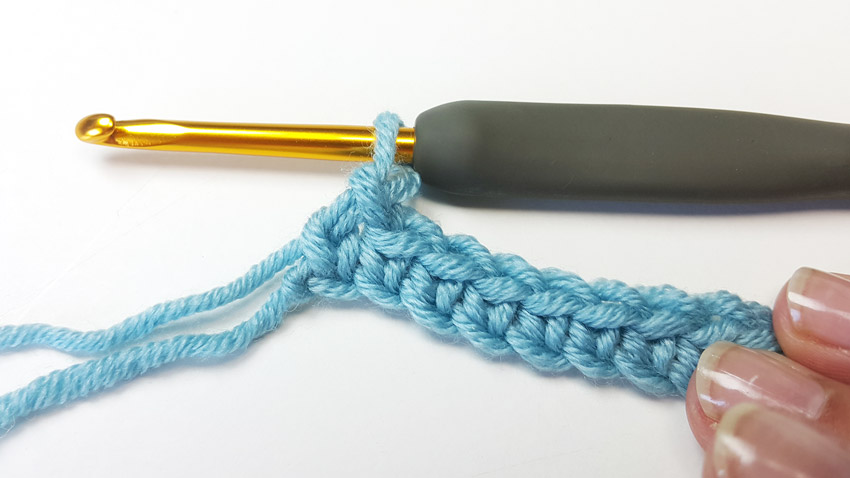
Step 8: Repeat Step 4 to 6 all the way across your foundation chain.
Step 9: To start the next row, chain 2. This will count as your first single crochet. Skip the next stitch as it belong to this turning chain.
Step 10: Insert hook into the top loop of the next stitch.
Step 11: Yarn over and pull up a loop.
Step 12: Yarn over, and pull the yarn through two loops.
Step 13: Repeat steps 10 to 12 all the way across to finish the row
And there you have it. You should have 9 proper single crochet and 1 turning chain, a total of 10 stitches for each row