
How to crochet the wattle stitch (step-by-step tutorial)
The wattle stitch is a beautifully textured crochet stitch that combines simple stitches to create a soft, layered fabric with gentle visual depth. In this step-by-step tutorial, you’ll learn how the stitch is built, how to maintain even tension, and how to use the wattle stitch in projects such as blankets, scarves, and home décor.

This post may contain ads and affiliate links, which help support Crafting with Beth at no extra cost to you. I only recommend tools and materials I genuinely use or believe will be helpful for your crafting. For more information, please see our Privacy Policy, Cookie Policy, and Affiliate Disclosure. Thank you.
Why you’ll love this stitch
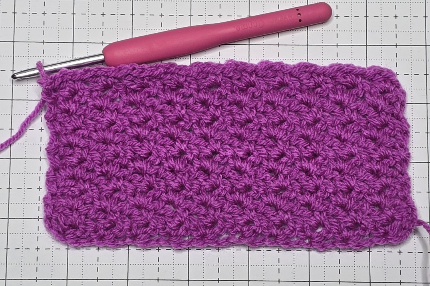
The wattle stitch is a wonderful example of how simple crochet techniques can come together to create something striking. With its subtle texture and balanced structure, this stitch produces a fabric that feels both decorative and practical—rich in detail without being overly complex.
In this step-by-step tutorial, you’ll be guided through the construction of the wattle stitch, learning how each row builds on the last to form its distinctive layered effect. Clear explanations and steady pacing make this stitch accessible for confident beginners, while its versatility and texture will appeal to more experienced crocheters as well.
Whether you’re looking to add interest to a blanket, create a cosy scarf, or explore new stitch combinations, the wattle stitch is a satisfying and rewarding technique to have in your crochet repertoire.
Let’s get started
Stitch Challenge
These are the basic crochet skills needed to be able to crochet the pattern.
- sl st – slip stitch
- ch – chain
- sc – single crochet
- dc – double crochet
Stitch Standards
I am using the US / International standard crochet terms.
Foundation Chains
This stitch requires multiples of 3 stitches + 2, plus an additional 1 chain for the base chain.
Tension: If you are making 21 stitches, add an extra 2 chains and another 1 chain for the base, giving you a total of 24 chains.
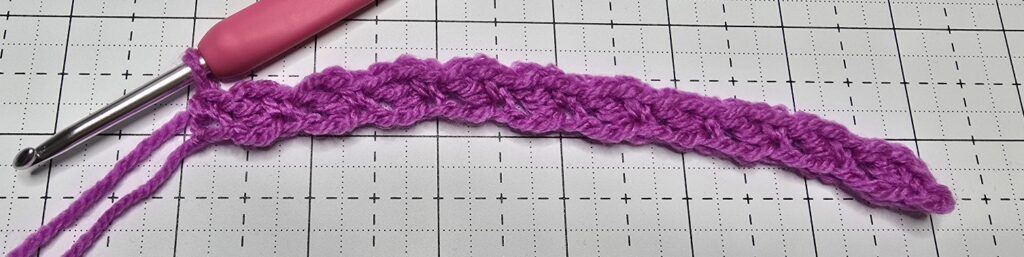
Row 1 (Right side)
Skip the first 2 chains from the hook (counts as 1 single crochet), * work [1 single crochet, 1 chain, 1 double crochet] into the next chain, skip the next 2 chains. Repeat from *, ending with 1 single crochet into the last chain. Turn.
Row 2 (Wrong side)
Chain 1 (counts as 1 single crochet), skip the first single crochet and next double crochet, * work [1 single crochet, 1 chain, 1 double crochet] into the next chain space, skip the next single crochet and double crochet. Repeat from *, ending with [1 sc, 1 ch, 1 dc] into the last chain space, skip the next single crochet, and work 1 single crochet on top of the turning chain. Turn.
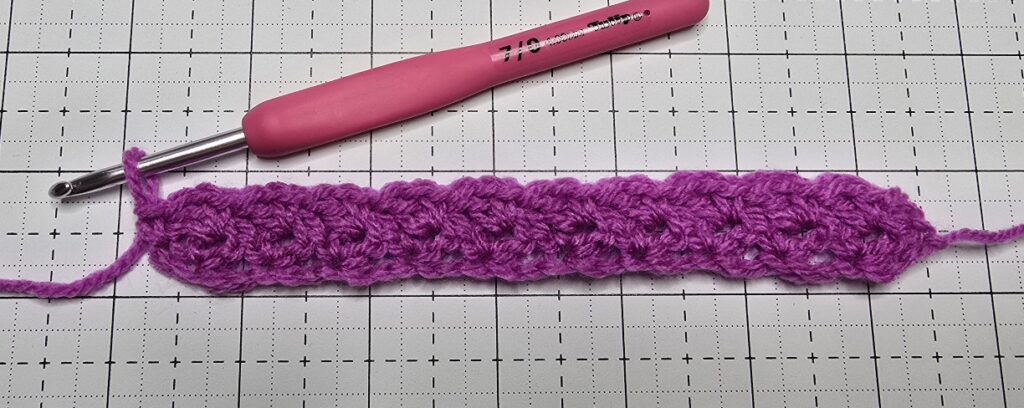
Repeat Row 2 to continue.
