
How to crochet the Leafhopper stitch (step-by-step tutorial)
The leafhopper stitch is a textured crochet stitch that creates raised, decorative shapes across the fabric. It has a bold, eye-catching look while still being worked from a simple repeating pattern, making it ideal for blankets, accessories, and statement crochet projects.

This post may contain ads and affiliate links, which help support Crafting with Beth at no extra cost to you. I only recommend tools and materials I genuinely use or believe will be helpful for your crafting. For more information, please see our Privacy Policy, Cookie Policy, and Affiliate Disclosure. Thank you.
About the leafhopper stitch
The leafhopper stitch is a textured crochet stitch that creates a beautiful raised pattern with a slightly playful, almost botanical feel. The stitch forms small, structured shapes that sit proudly on the surface of the fabric, giving it depth and visual interest without being overly bulky.
This stitch works especially well for projects where texture is the star, such as blankets, cushion covers, scarves, and decorative panels. While it looks intricate, the leafhopper stitch is created using a simple repeat, making it achievable once you are comfortable with basic crochet stitches.
The resulting fabric is sturdy and eye-catching, with a lovely balance between structure and softness. Whether worked in a single colour or with gentle colour changes, the leafhopper stitch adds character and charm to any crochet project.
- Yarn: DK (light worsted) yarn
I recommend using a smooth, light-coloured yarn when learning this stitch, as it helps the ribbed texture stand out clearly. DK yarn works particularly well for practice swatches, scarves, and blankets. I used Stylecraft Special DK for this tutorial as it shows the ribbed texture clearly. - Crochet hook: 4.0 mm
I used a 4.0 mm hook for this tutorial. Ergonomic hooks like Tulip Etimo Murasaki crochet hook are especially helpful for textured stitches like this one, as they keep your tension even and reduce hand fatigue during longer sessions. - Scissors
For cutting yarn neatly at the end of your work. - Yarn needle
To weave in your ends once your swatch or project is complete.
Tip: If you tend to crochet tightly or loosely, don’t be afraid to adjust your hook size slightly to achieve a fabric you’re happy with.
To crochet the leafhopper stitch, you don’t need a specific brand of yarn. A smooth DK yarn works best, as it helps the texture and stitch definition stand out clearly.
Yarn options:
- UK gentle readers: A beginner-friendly DK yarn from Laughing Hen
- International readers: A wide colour selection of DK yarns from LoveCrafts
Crochet skills required
Crochet stitches standard: I am using the US / International standard crochet terms.
This stitch is suitable for confident beginners and above. Before starting, it helps to be comfortable with the following basic crochet skills:
- Making a slip knot
- How to crochet a foundation chains
- How to crochet the half-double crochet
- How to crochet the double crochet stitch
Let’s get started
Tension is very important. The yarn must glide smoothly from your tension hand to your working hand — not too tight, not too loose — and follow the gauge of your hook.
Featured stitch: Leafhopper cluster stitch (LCS)
*[yarn over, insert your hook at the front and from the right to the left of a specified stem|post of a stitch (front post), yarn over and pull up a loop, and make that loop a height of a half-double crochet] twice, yarn over and pull through all 4 loops on the hook **, skip the next stitch, then repeat from * to ** around the stem|post of the next stitch, and ending the stitch with yarn over, and pull through all 3 loops on the hook.
Foundation chains
The leafhopper stitch is a multiple of 4 chains + 1 + 2 for the base chain. For this demo I will chaining 20 + 1 + 2, that's 23 chains total.
Row 1 (WS)
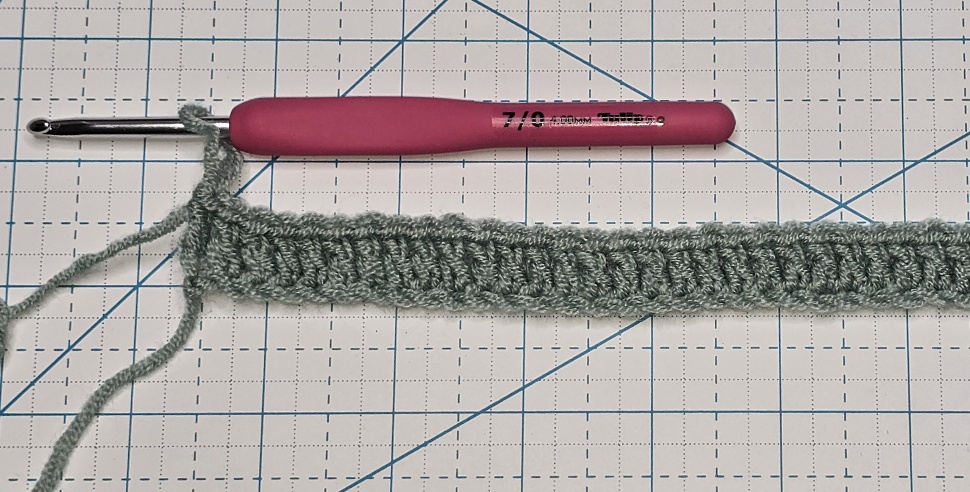
To start the first row, skip 3 chains, this will be counted as first double crochet, and make 1 double crochet in each chain stitch all the way to the end. You can choose to make the stitch into the top loop or the back ridge of each chain, both will work well. Turn.
Check: You should have a row of 21 double crochet total
Row 2
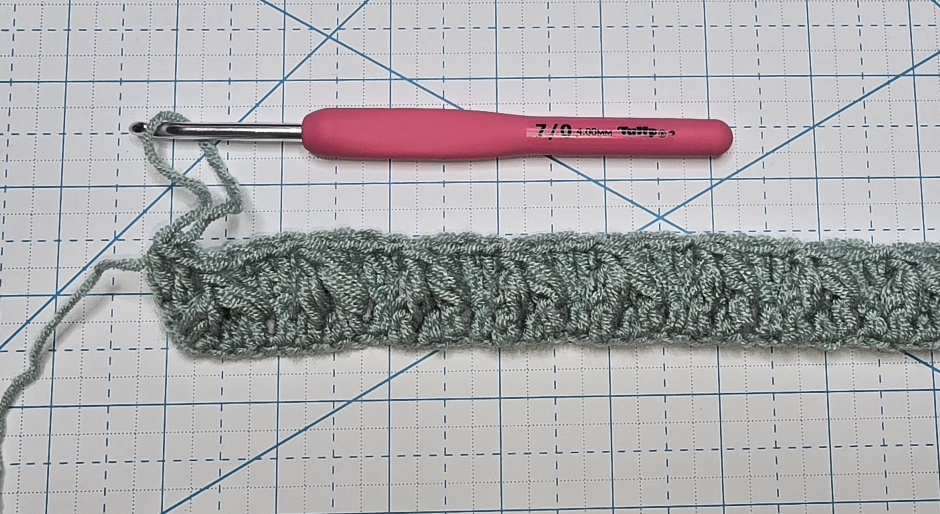
This row is where we make the exciting stitch. Chain 3, this will be counted as 1 double crochet and will skip that first stitch, 1 double crochet in the next stitch. * [1 LCS over the next stitch, starting from the stem of the previous stitch of the double crochet just worked with. Skipping the next stitch from last double crochet, make 1 double crochet in each of the next 3 stitches. ]. Repeat * all the way through the end. At the end, you will only be making 2 double crochet instead of 2.
Checkpoint:
- You should still have 21 stitches for this row.
- You should have matching 2 double crochet on each side of the current row including the chain 3 at the beginning
- Behind the leafhopper stitch, you should only have 1 skipped stitch from previous row. Refer to top tips #1 below
Row 3
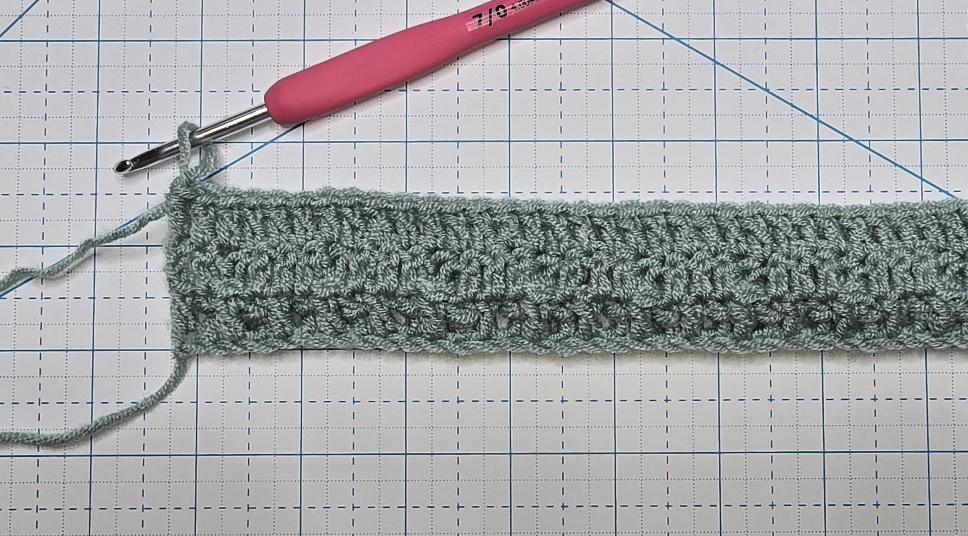
This row is the easier one. Chain 3, this will be counted as first double crochet, and make 1 double crochet in each chain stitch all the way to the end.
Check: You should have a row of 21 double crochet total.
Row 4
To start row 4, chain 3 and this will be counted as 1 double crochet, and that would mean skipping the first stitch. Now we're going to zigzag|offset the leafhopper stitches by 3 stitches and that would mean the leafhopper stitches for this row are exactly centered between 2 leafhopper stitches from previous repeat. So, *[make 1 double crochet in each of the next 3 stitches, make 1 LCS over the next stitch]. Repeat * all the way through the end, and working 1 double crochet on the top chain at the end. Turn
Checkpoint:
- You should still have 21 stitches for this row.
- You should have matching 4 double crochet on each side of the current row including the chain 3 at the beginning
- Behind the leafhopper stitch, you should only have 1 skipped stitch from previous row. Refer to top tips #1 below
- Examining your leafhopper stitches, each placements should be exactly centered between 2 leafhopper stitches from previous row repeat. Refer to top tips #2 below
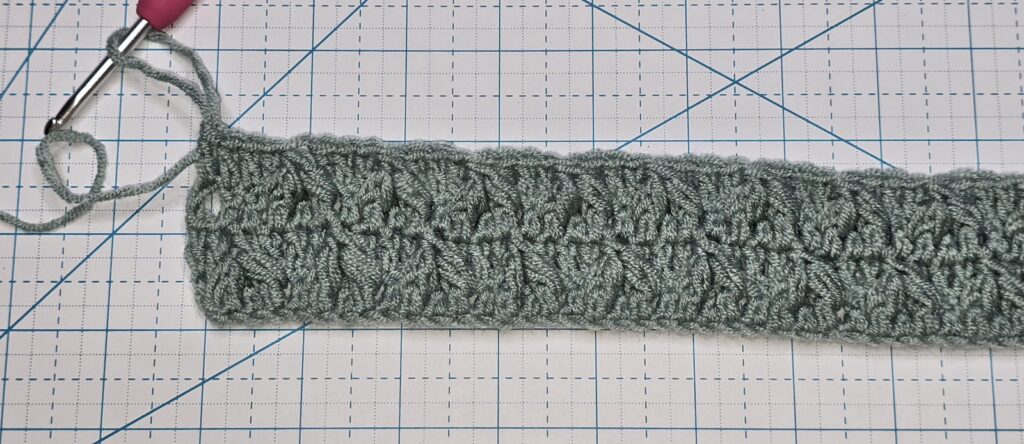
Top tips
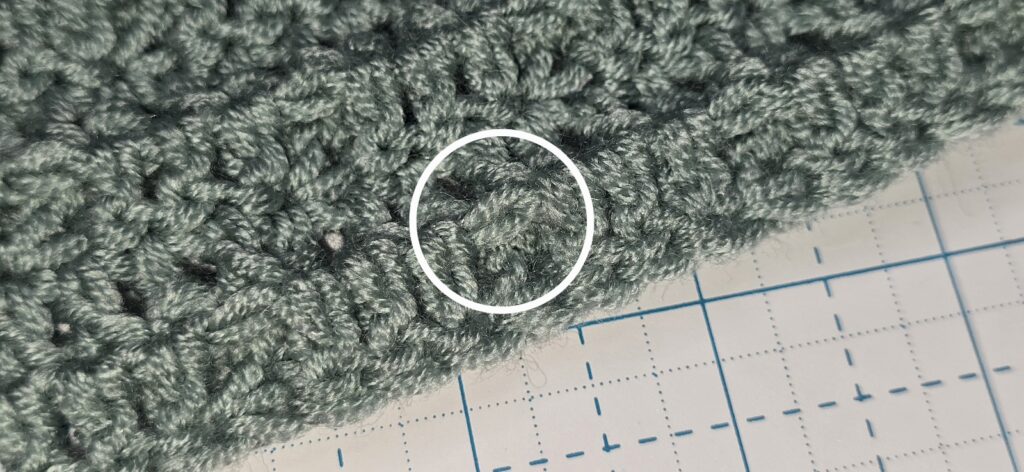
Tip 1
Make sure you only have 1 skipped stitch behind each leafhopper stitch. Please refer to the image below.
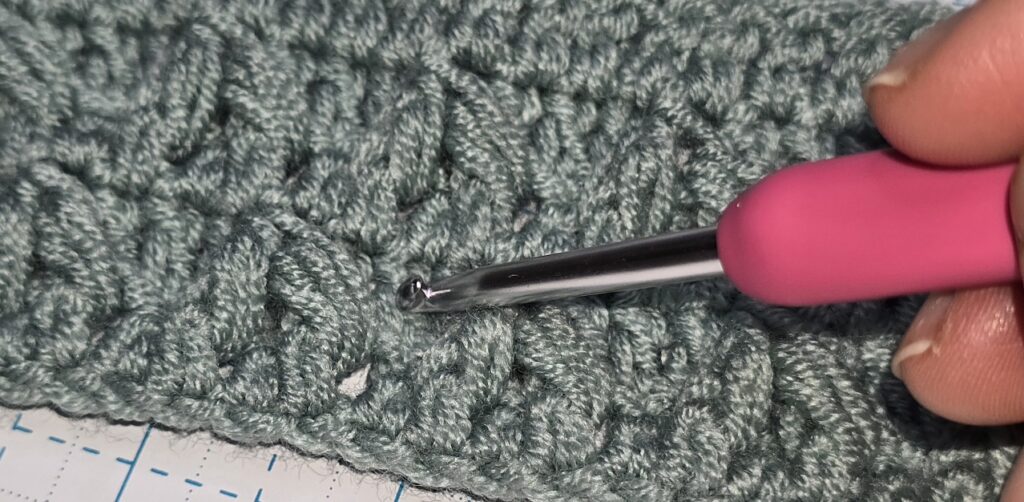
Tip 2
The leafhopper leafhopper stitch is an inset (or zigzag) stitch, meaning the next time you repeat the row, the leafhopper stitch is not straight above the previous leafhopper stitch but it is exactly between 2 leafhopper stitches. Since the leafhopper stitch requires 3 stitches to complete the stitch, in this patter there is an additional double crochet to separate each stitches. In the image below, I am pointing out where that is, and you can use it as reference as the middle point to center your next leafhopper stitch. I hope I have explained it clearly.
This is the leafhopper stitch.
